Wednesday, April 24, 2024

One More Scenic Card

I promised you an alternative to the scenic card I showed on Monday.   So here is a way to hide your greeting until the card is opened:


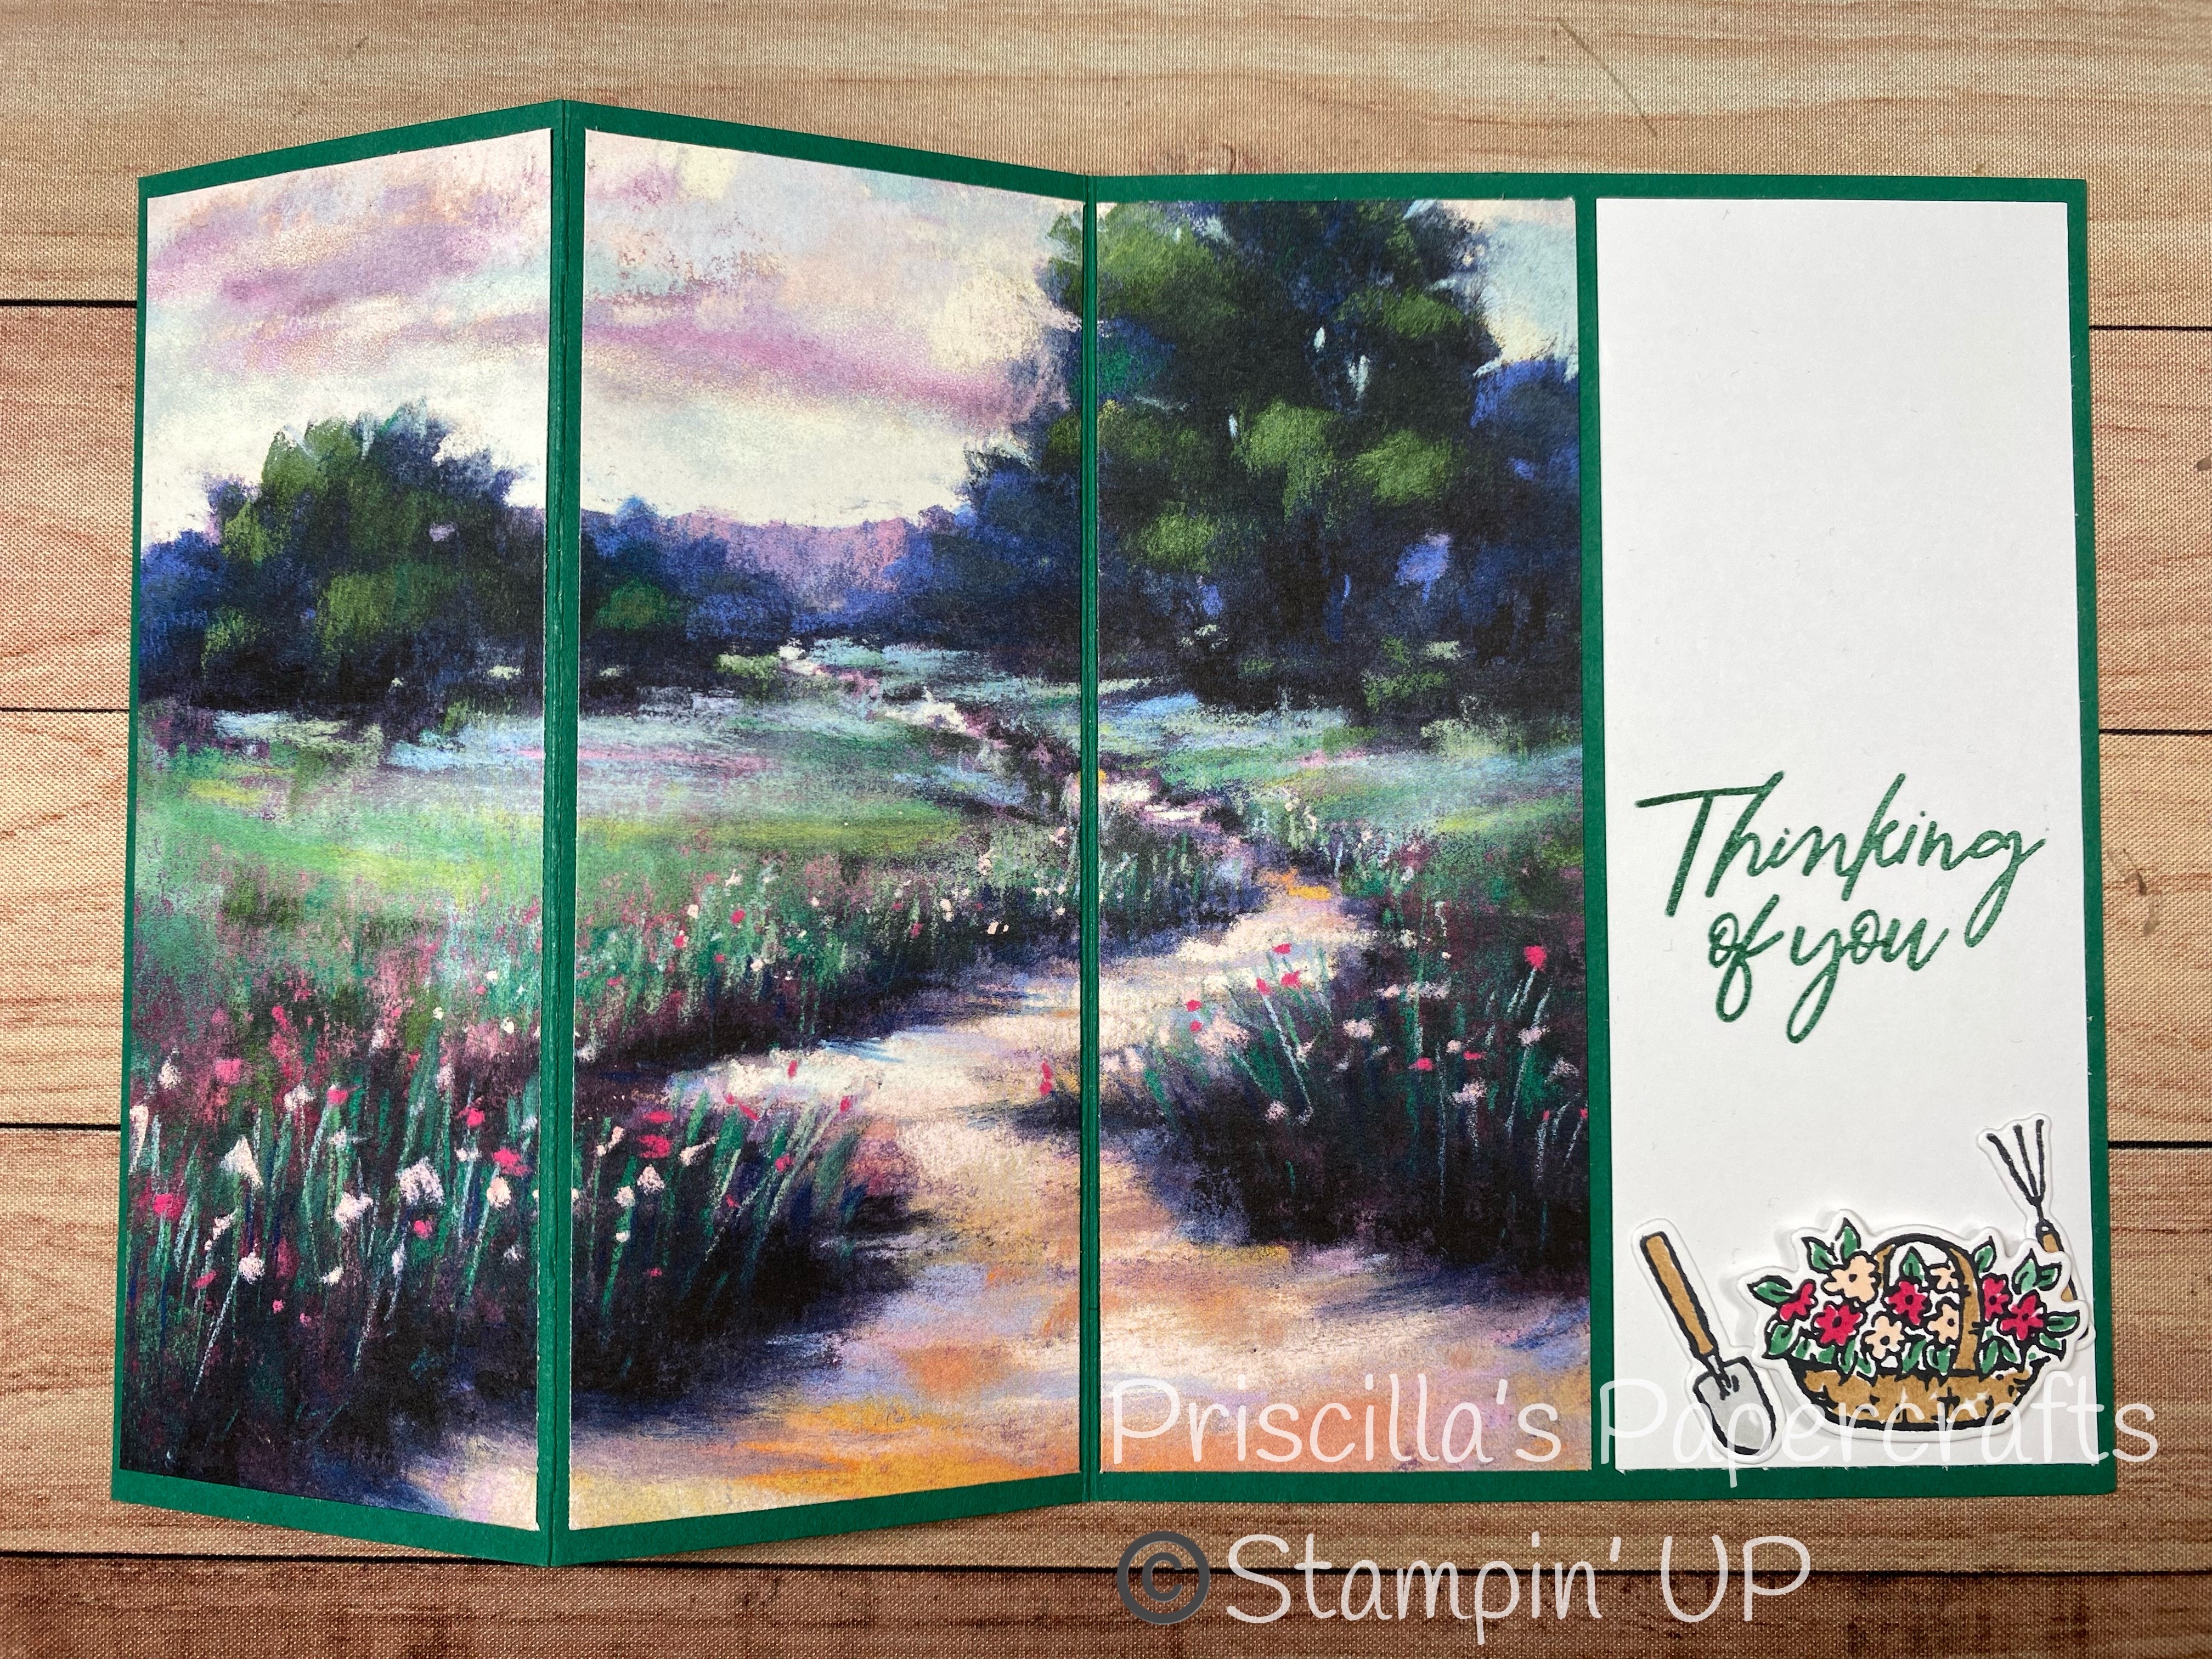
Once again, this card has a card base measuring 5-1/2" x 8-1/2", scored at 2-1/8" and 4-1/4".

The Designer Series Paper is 5-1/4" x 6" - trim just 3/4" off either the top or the bottom of the paper.

Then add your first piece of DSP to the smaller column on the left of the card.  

Next add the middle piece of DSP to the other small column.

Now here is where the difference is from the card I showed on Monday:


Add a 2" x 5-1/4" piece of Basic White cardstock next to the 4-1/4" score line, and then add your last piece of DSP.  

Fold the card in half, and then fold the 2-1/8" piece BACKWARDS over the front of the card.  This hides the white greeting piece inside until the card is opened, and still allows you to use the entire piece of DSP.

Find a gorgeous piece of designer paper, and create your own!  


Product List

Monday, April 22, 2024

Scenic Papers

 Have you ever used a 6"x 6" piece of Designer Series Paper with a beautiful scene, but had to cut it to fit your card, and missed out on using the entire scene?  

Well here's a way to capture the beauty of the full panel (well almost!) and use it on your card:


But wait!  You said you wanted the entire sheet of DSP, right?  OK, hold on, just a sec.

Start with a piece of cardstock measuring 5-1/2" x 8-1/2" (standard card size).  Score it at 2-1/8" and       4-1/4".  

Trim your pretty DSP (a 6" x 6" sheet) to 5-1/4" x 6" (be sure to trim ONLY the bottom OR the top of the scenic paper), and then cut it into 2" strips.

Adhere the left-most 2" piece of the DSP to the cardstock on the 2-1/8" x 5-1/2" strip.  Then:


Aha!  Here is the rest!  Add your two other pieces of DSP to the panels as shown.  This will allow you to see the whole scene!  Beautiful!

The card will be folded in half, and then the front panel (the piece scored at 2-1/8") is folded BACK over the front, creating the first panel that you see.  

Add a piece of Basic White (or a lighter piece of coordinating cardstock) cut to 2" x 5-1/4" to the last panel, as shown.  Here is where you can write a greeting, add a die-cut, or stamp an image.  

To write to your recipient, you can add a piece of 4" x 5-1/4" Basic White cardstock to the back of your card.  

Check back later this week for an alternative card using the same dimensions.  

And have fun creating a gorgeous scenic card!


Product List

Tuesday, April 16, 2024

Bubble Bath Roses

My sister has been visiting this past week, and she told me she had to attend a wedding in May.  After perusing my craft room, she asked if I could make her a card.  Of course!


 She told me the theme of the wedding party is "romance", and when she saw the gorgeous card I had made using the new Layers of Beauty masks, she wanted one of those.

Of course I can't just copy a card I had already made!  I don't work like that...so I had to create a new one for her.  


Don't these roses look "romantic"?  Colors used were Bubble Bath, Fresh Freesia and Petunia Pop, along with Old Olive and Mossy Meadow for the leaves.  

I cut down my main panel so I could add it to a Bubble Bath frame made with the Scalloped Contours dies.  This was then popped up over an embossed Petunia Pop layer (embossed with the Exposed Brick folder), and onto a Thick white card base.

And for the inside:


A very simple sentiment  with a Petunia Pop layer.

And did you note the envelope flap?  Stamped with a small flower from the Layers of Beauty stamps and colored with Blends.  


Layers of Beauty - coming May 1st!


Product List

Monday, April 15, 2024

Mediterranean Blooms Meets Sweet Citrus

 Now that my Cards-by-Mail have been received by my customers, I thought I would show you the cards they are making.  

The first one features the beautiful Mediterranean Blooms Designer Series Paper, which will be available for purchase on May 1st.  


The Daffodil Delight layer is embosses with the soon-to-be-retired Sweet Citrus hybrid embossing folder, one of my favorites!  

Another retiring product:  the Garden Green frame was cut with the Scalloped Contours dies, and then the DSP was layered onto it.


It was fun to bring in the little lemon, one of the dies in the Simply Sparkling set.  It tied into the paper so well!

The retiring products sale is in full swing, with many items already gone.  If you have been waiting to place an order, you may not want to wait any longer!  


Product List